
Here’s What You Need to Make this Burrito Bowl
- Chicken breasts: I used 2 boneless, skinless chicken breasts for this recipe. If you’re planning for leftovers or meal prepping, just cook more chicken!
- Quinoa: This recipe calls for 1 cup of cooked and cooled quinoa. When cooking, remember to use twice as much water as quinoa.
- Salsa: I love a good chunky salsa, but you can use your favourite store-bought or homemade version.
- Arugula: You’ll want plenty of freshness to break up the flavours of your bowl.
- Chickpeas: I ended up needing one 14-ounce can of chickpeas. Don’t forget to drain them before adding to the bowl.
- Fresh fruits and veggies: The best part! I included two red bell peppers, corn, cherry tomatoes, an avocado
- Mayonnaise: You’ll only need 3 tablespoons of whatever mayo you have in the fridge.
- Sriracha: More spicy, more sriracha! I’d recommend using at least 1 tablespoon, but you can adjust based on the spice level you’re aiming for.
- Honey: You can use the honey to balance out the spice — this is the sweet to the spicy! If your bowl has a little too much heat, just add a little more honey to even out the flavours.
- Seasonings: Several different seasonings go into this recipe, including chili and garlic powder, cumin, salt and pepper, lime, and fresh chopped cilantro.

Ingredients
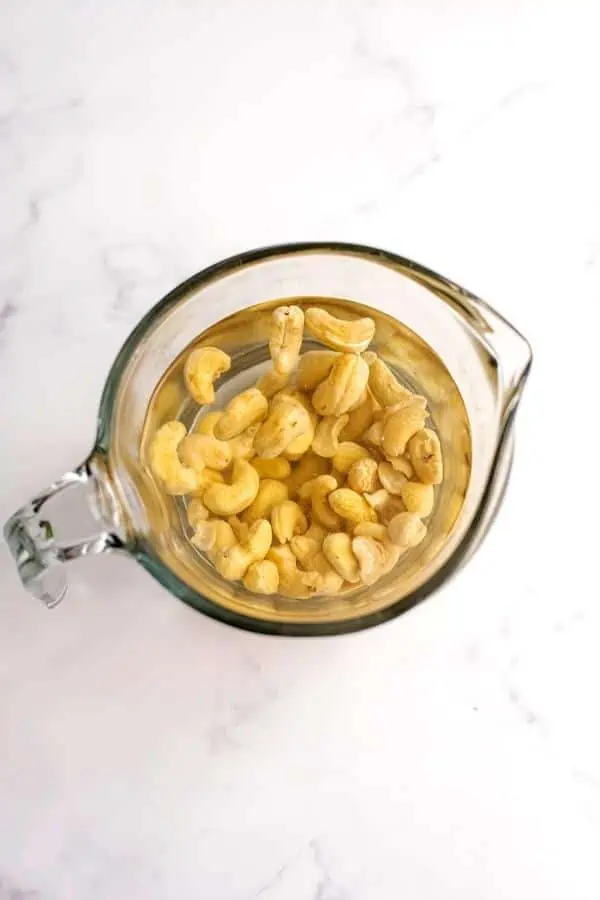
Cashews + water – raw cashews work best for this recipe, but you can also use roasted if that is all you have on hand. The cashews soak in hot water and soften, making them the perfect base for this spicy vegan sriracha mayo recipe. If you need tips on how to soak cashews, check out the 4 best ways below! You can also make this without cashews if you need this recipe to be nut free. Hemp hearts and sunflower seeds will also work great in this recipe.
Sriracha sauce – sriracha sauce is a spicy condiment made from ground red chili peppers, sugar, garlic, salt, and vinegar. You can find sriracha in most stores and it’s a great way to add spice to any meal. You can even find Whole30 compliant sriracha that is sweetened with dates, so there is no reason not to love this spicy sriracha mayo recipe!
Lime juice – lime juice adds that tangy punch that you are looking for in mayonnaise. It also pairs well with the sriracha. You could also use lemon juice or even rice wine vinegar if you don’t have lime juice on hand.
Spices: Salt and garlic powder – these help to the vegan sriracha mayo pop in flavor. The salt enhances the flavors, and the garlic powder provides some umami. You could also use fresh garlic but it can be very harsh when it’s raw, so I prefer garlic powder.
Recipe
Ingredients
For the Fried Chicken
- 1 tablespoon Salt
- 250 ml Cider Vinegar
- 250 ml Water
- 4 Boneless Skinless Chicken Thighs
- 250 ml Buttermilk
- 210 g Self-Raising Flour
- Vegetable Oil Enough to use to deep fry in a saucepan
For the Slaw
- ¼ Large White/Red Cabbage thinly sliced with a mandolin
- ½ Red Onion thinly sliced with a mandolin
- 1 Red Chilli finely chopped
- 3 tablespoon Cider Vinegar
- Juice of half a lime
- Salt and Pepper
To Serve
4 Burger Buns
Instructions
- Mix the water, salt and vinegar in a large bowl. Place the chicken in the bowl and cover with cling film. Place in the fridge for at least a couple of hours or preferably overnight.
- To make the slaw place all the ingredients in to a large bowl with a good sprinkling of salt and pepper. Cover and chill until ready to use.
- To make the sriracha mayo place all the ingredients into a bowl and mix thoroughly. Cover and refrigerate until ready to use.
- When you’re ready to make your chicken remove it from the bowl and pat dry. Place the buttermilk in a bowl and the flour in a separate bowl. Add a tablespoon of pepper to the flour and stir in. Add three tablespoons of buttermilk to the flour and mix in with your fingertips so that clumps of the flour form.
- Before you start frying the chicken, make the wedges. Preheat the oven to 180°Place the wedges on a baking tray with a good sprinkling of salt and pepper and the olive oil. Place in the oven for 30-40 minutes until cooked and crispy.
- Now finish the chicken. Heat the oil in a saucepan and use a thermometer to make sure it gets to 425°F (it will go down in temperature when you add the chicken). Place the chicken thighs into the buttermilk. Take each piece of chicken out of the buttermilk and allow the excess to drip off. Place the pieces into the flour one at a time and make sure they’re coated in a thick layer of flour.
- Once the oil has reached the right temperature carefully place the chicken pieces into the oil. Make sure the oil stays between 300 and 350°Cook for about 2 minutes on the first side until it’s really brown and crispy. Flip onto the other side and cook for another 2-3 minutes until the chicken is cooked through. Remove the chicken and place on a paper towel covered plate to soak up the excess oil. Sprinkle some salt over the chicken.
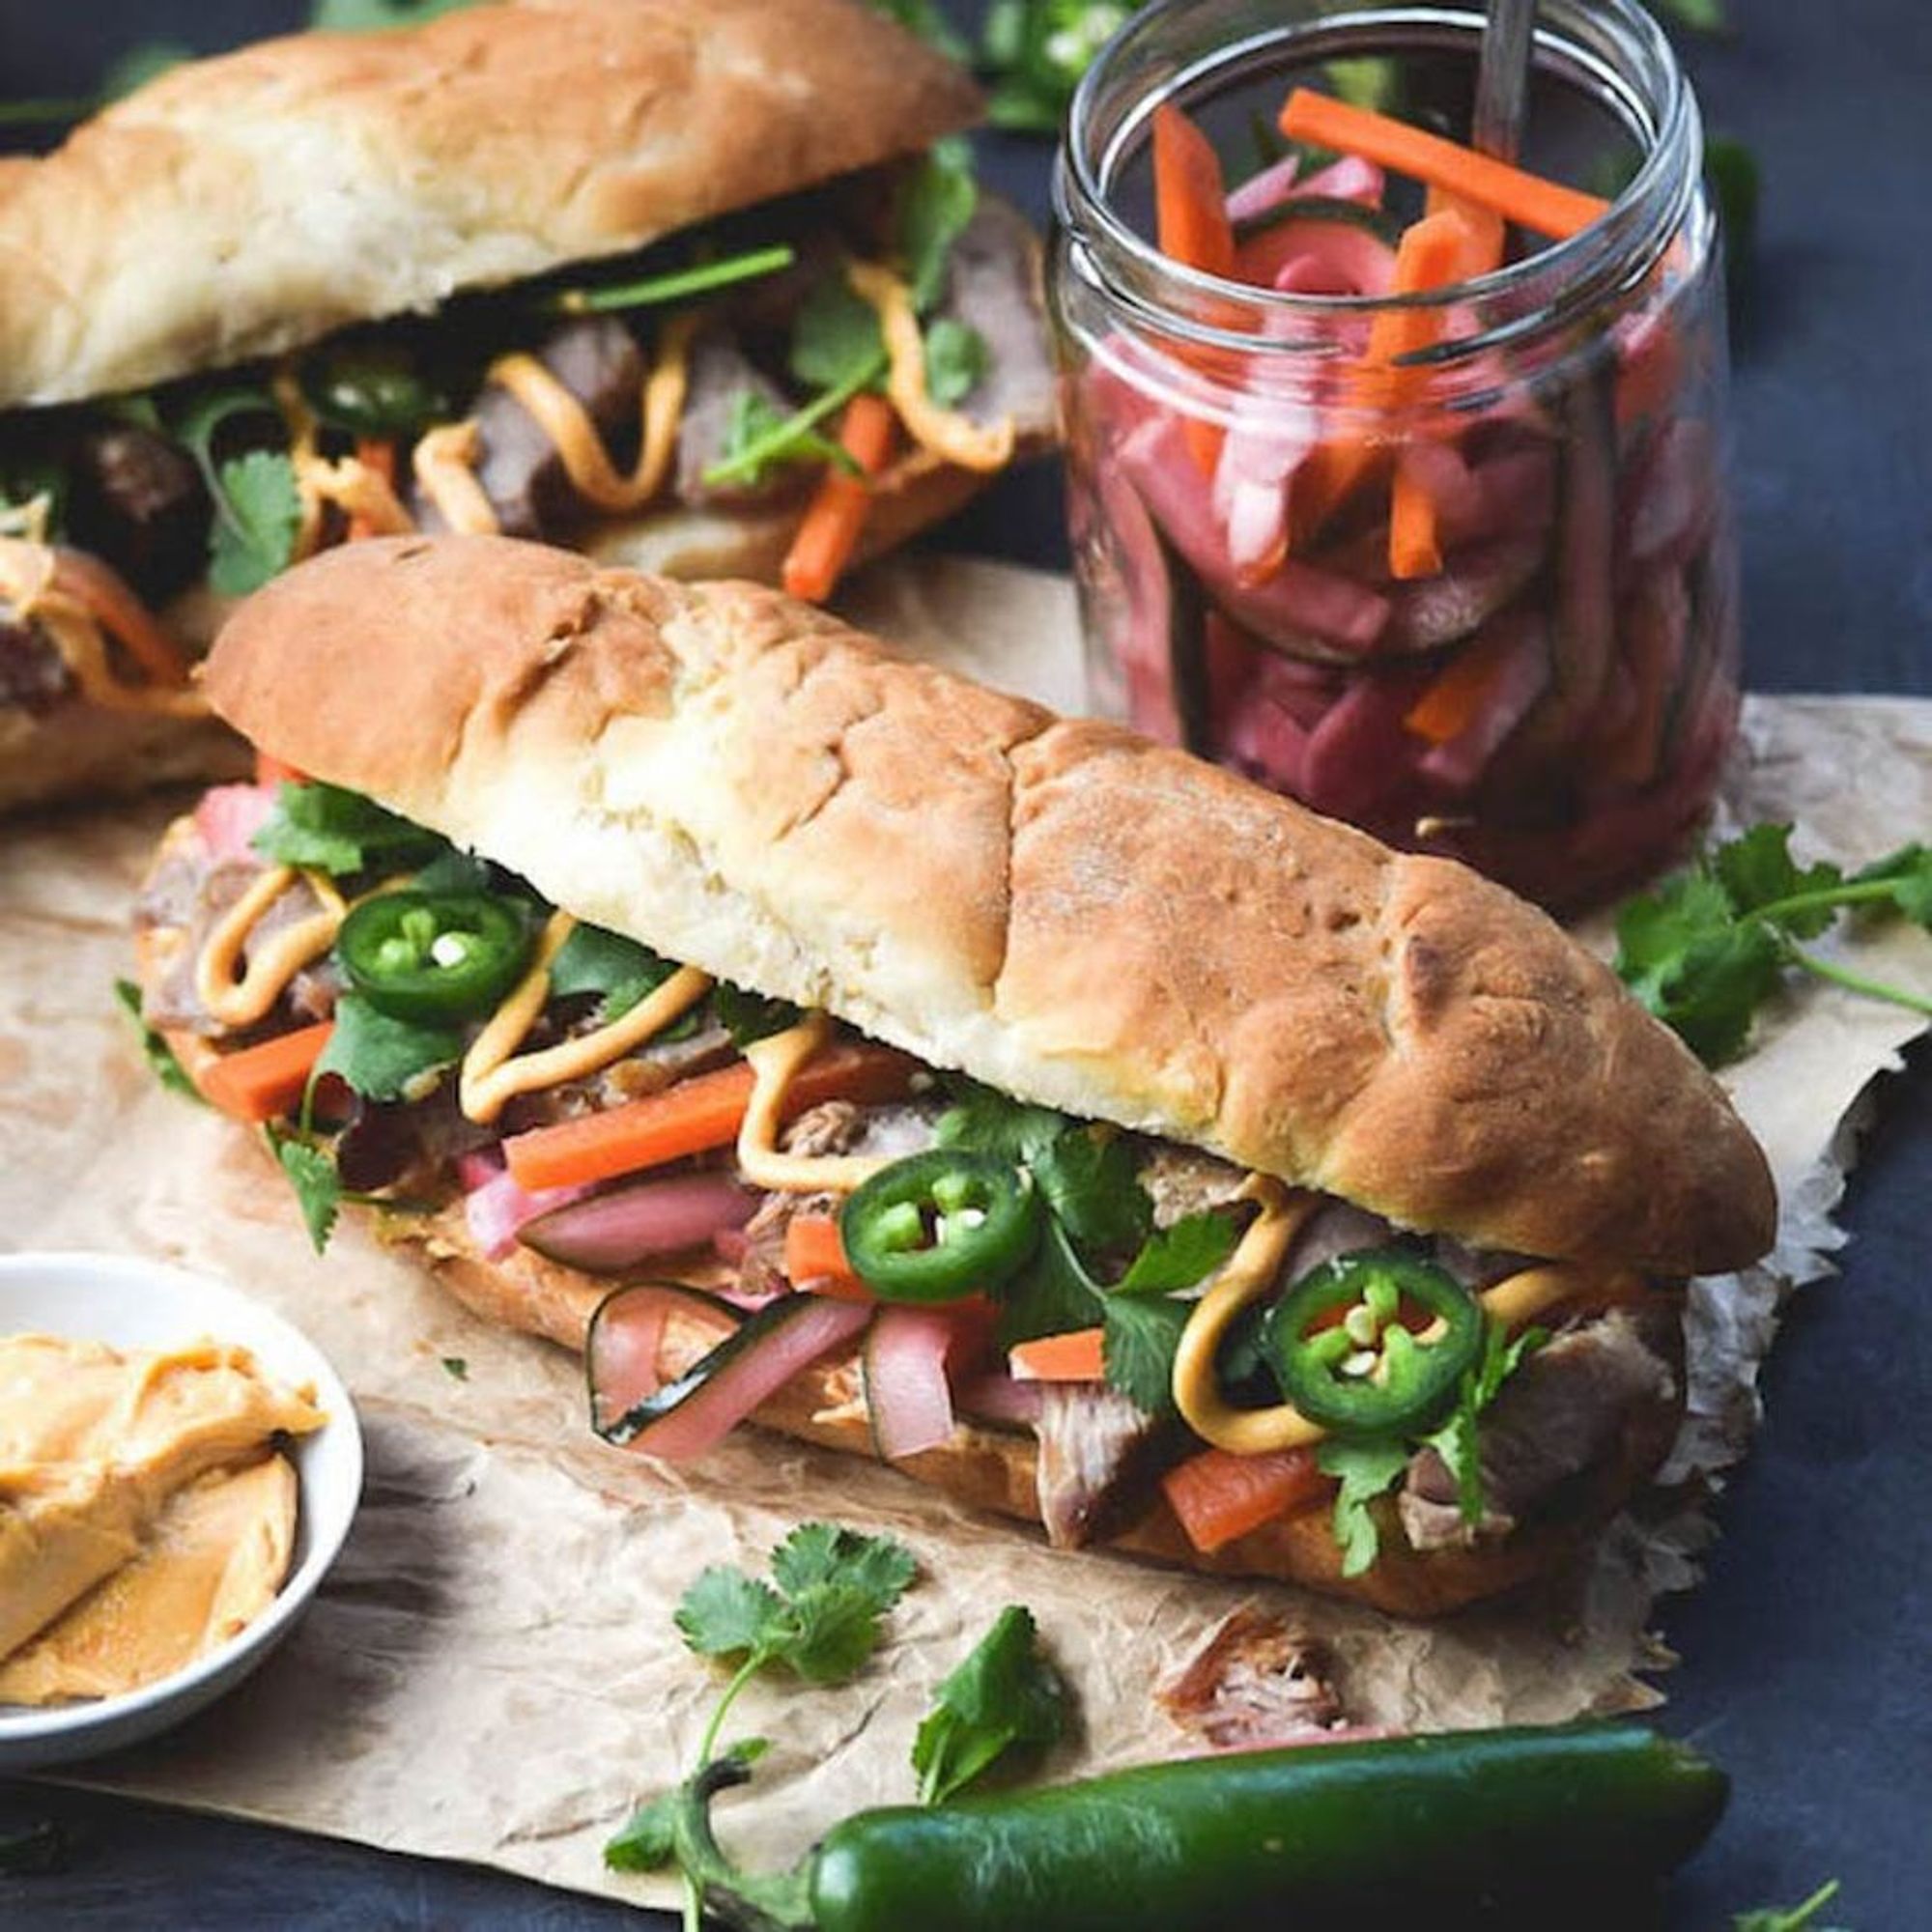
- Remove the wedges from the oven and sprinkle with salt and the chopped thyme. Assemble the sandwiches by spreading some of the mayo on the bottom bun, top with a piece of chicken followed by some slaw, some more mayo and the top bun. Enjoy!
Nutrition Facts
Buttermilk Fried Chicken Sandwiches with Cabbage Slaw and Sriracha Mayo
Amount Per Serving
Calories 784
Calories from Fat 333
% Daily Value*
Fat 37g57%
Saturated Fat 7g35%
Cholesterol 126mg42%
Sodium 2417mg101%
Potassium 697mg20%
Carbohydrates 70g23%
Fiber 3g12%
Sugar 10g11%
Protein 35g70%
Vitamin A 875IU18%
Vitamin C 51.5mg62%
Calcium 198mg20%
Iron 3.7mg21%
* Percent Daily Values are based on a 2000 calorie diet.
Make sure you follow The Cook Report on Instagram and tag #TheCookReport so we can see what you’ve made!
Did you make this recipe?Tag @amycookreport on Instagram and hashtag it #thecookreport!
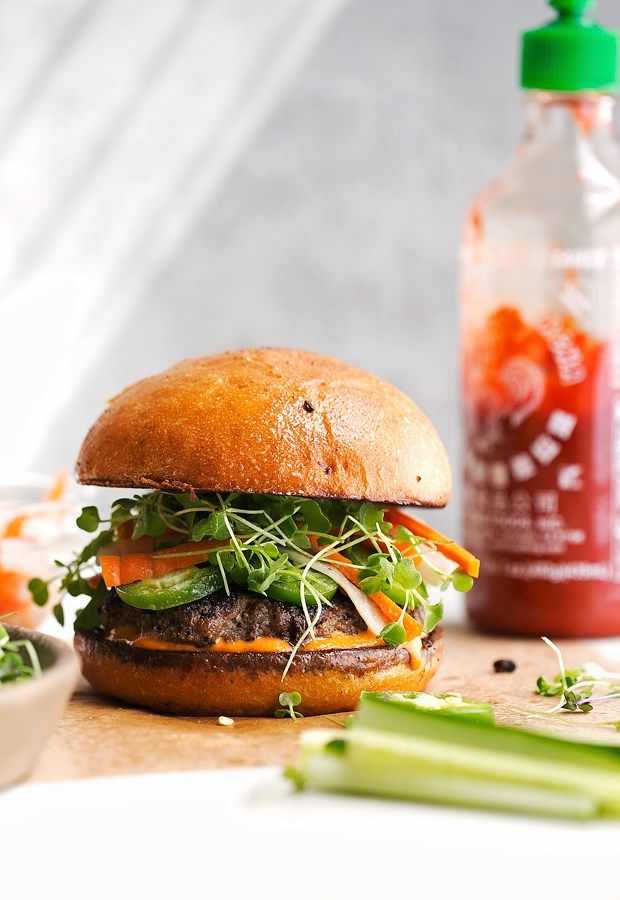
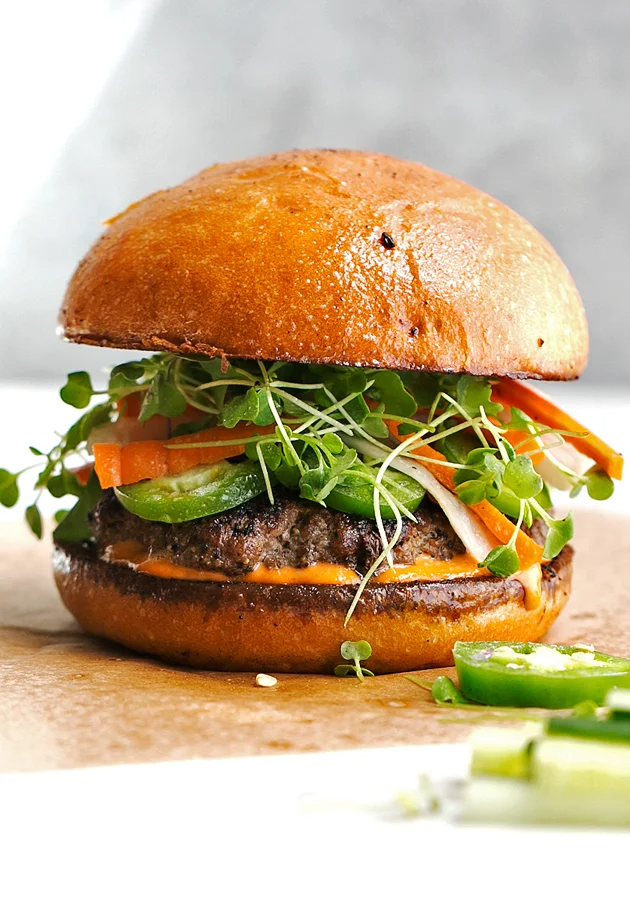
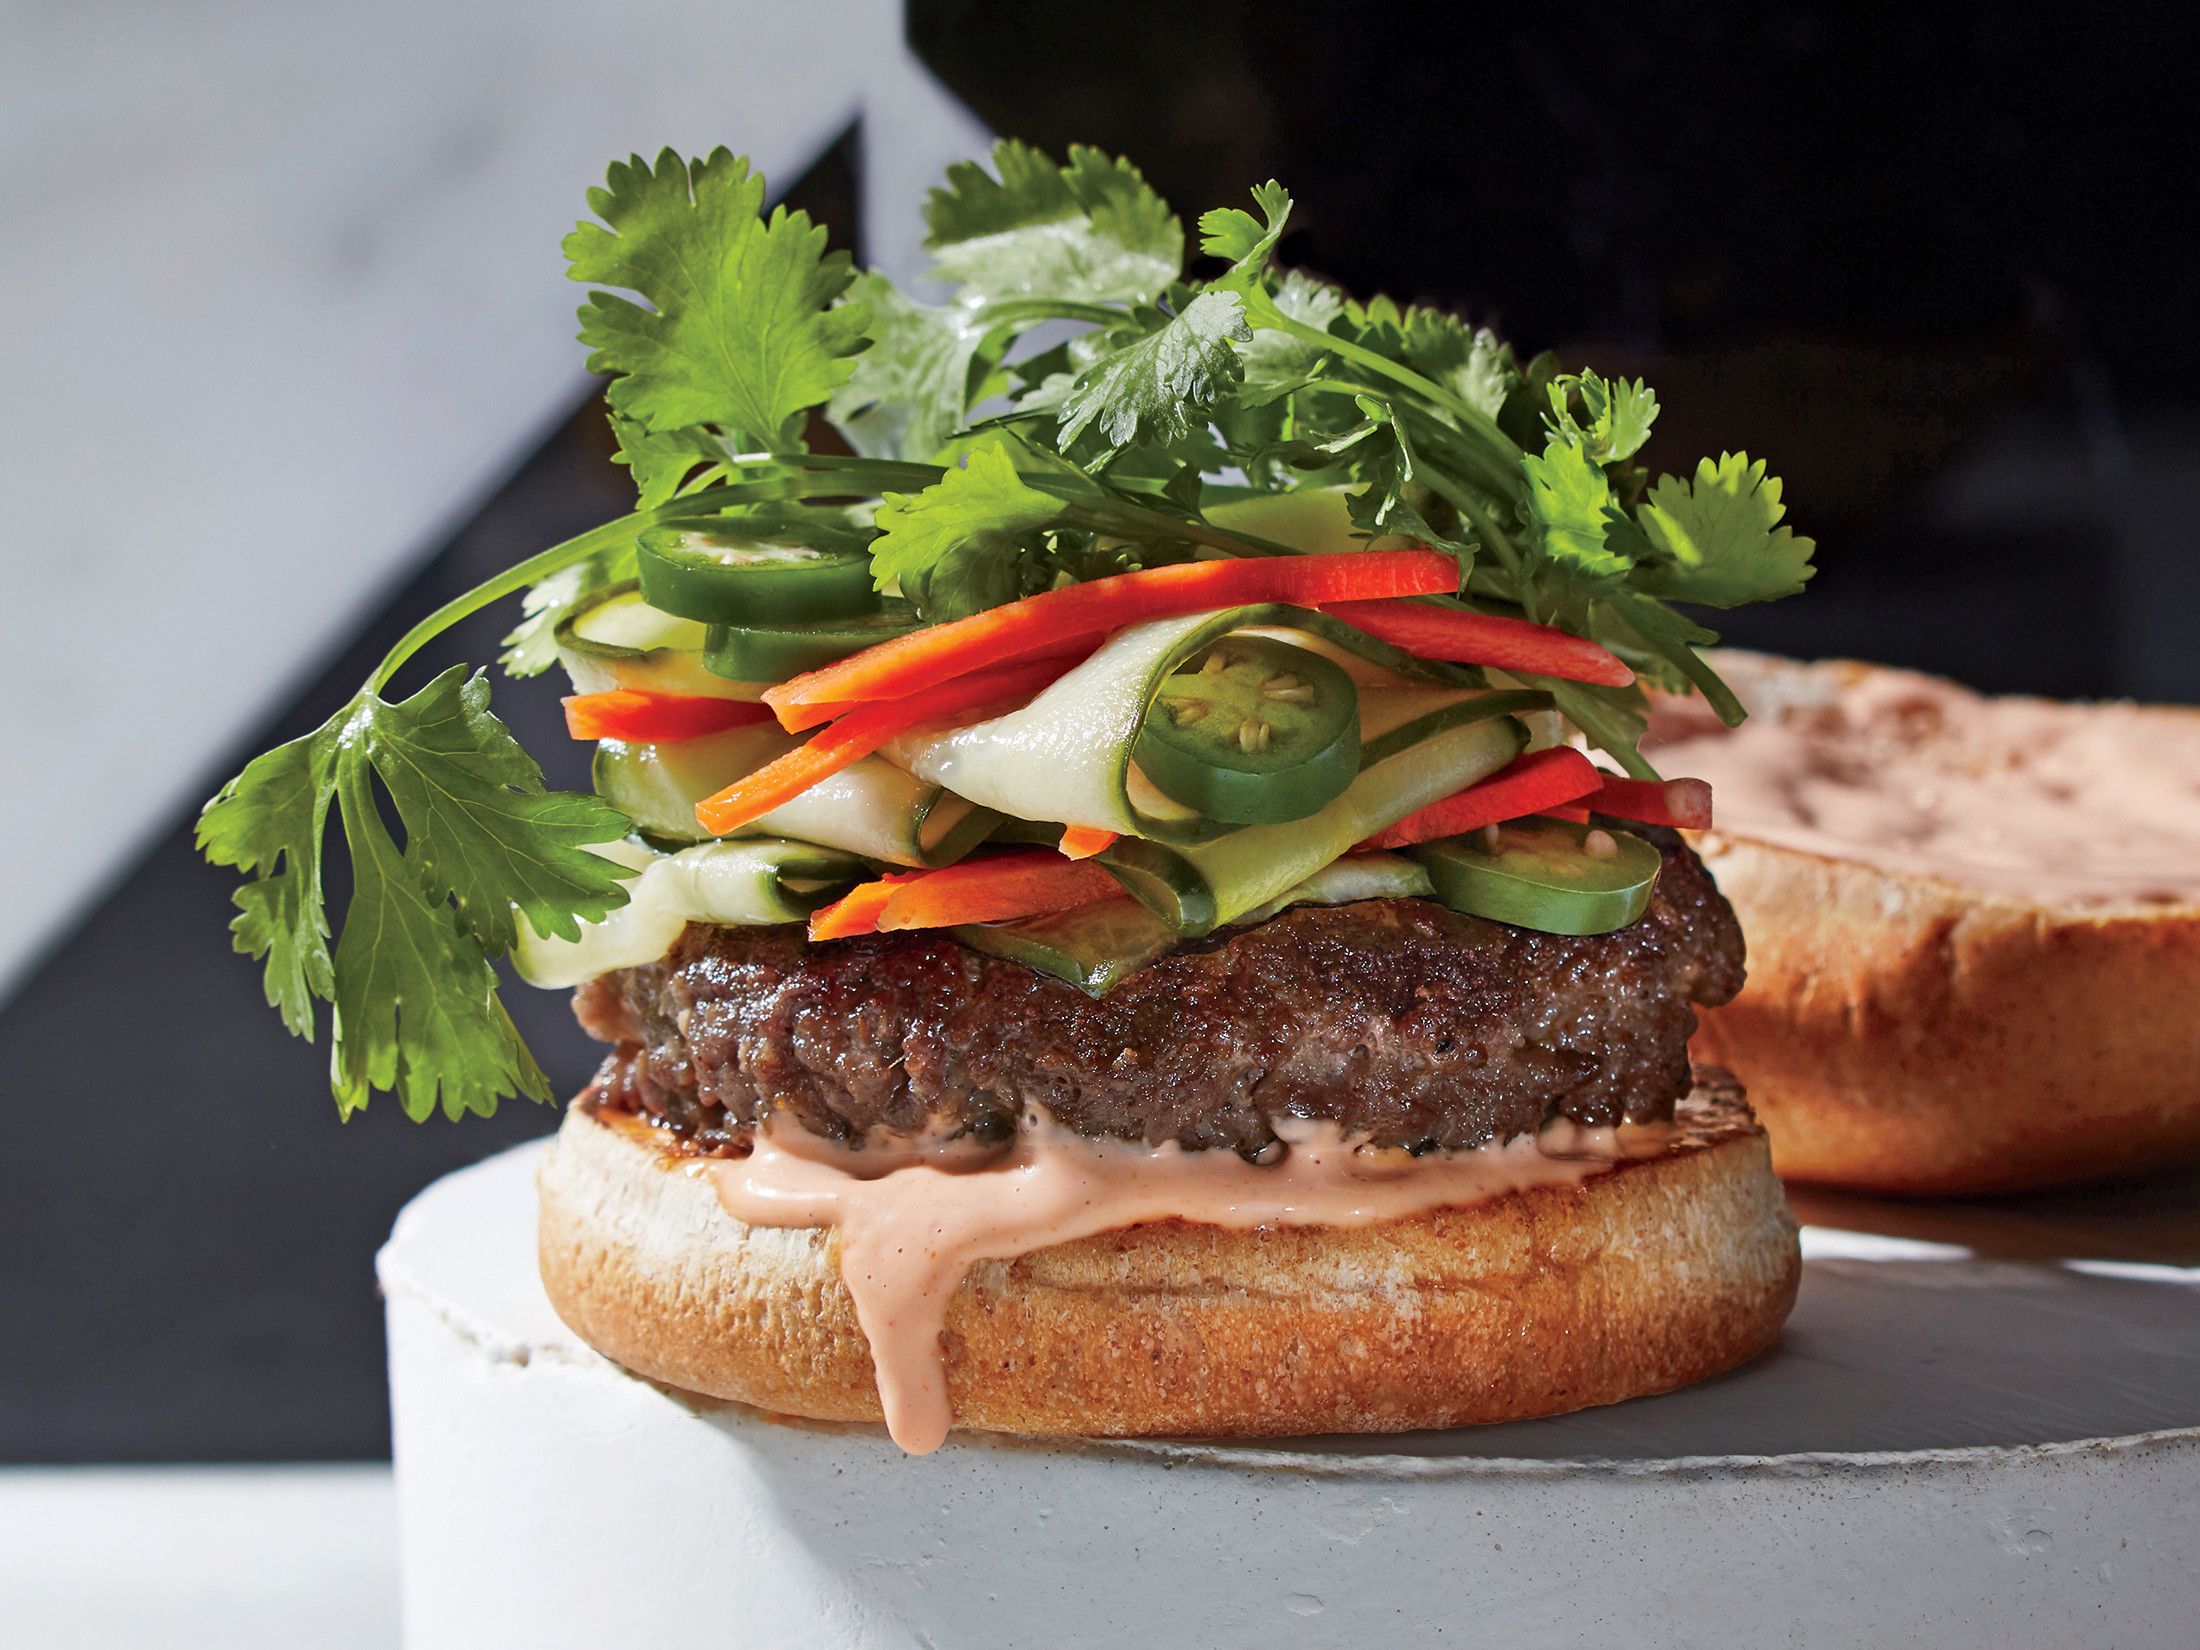
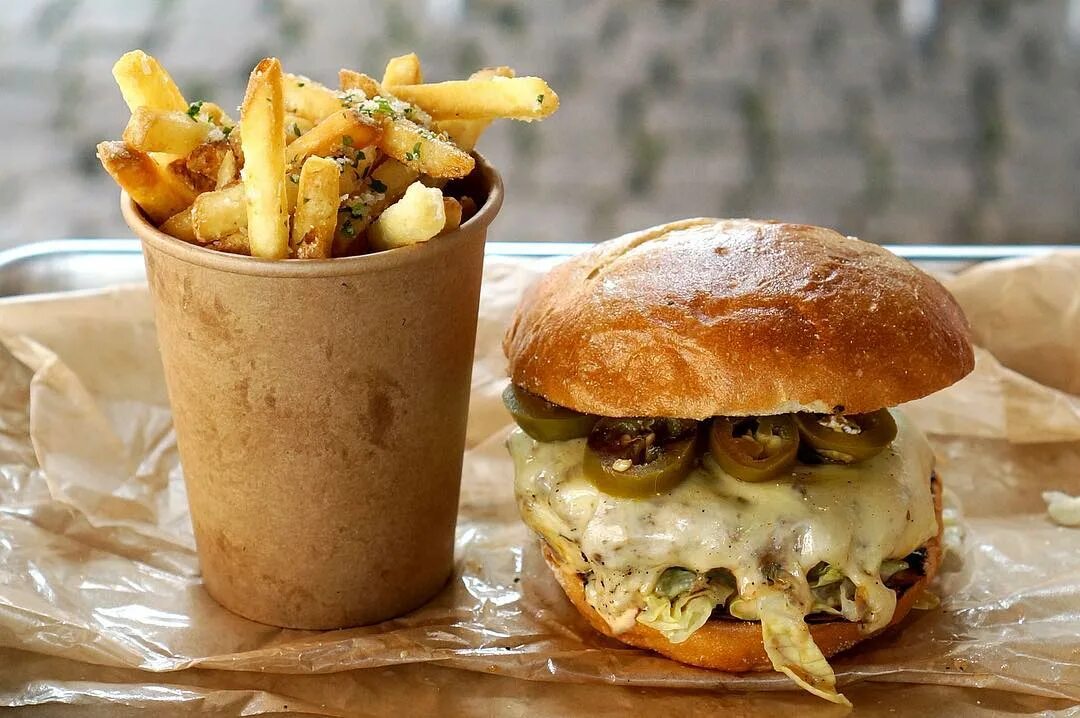
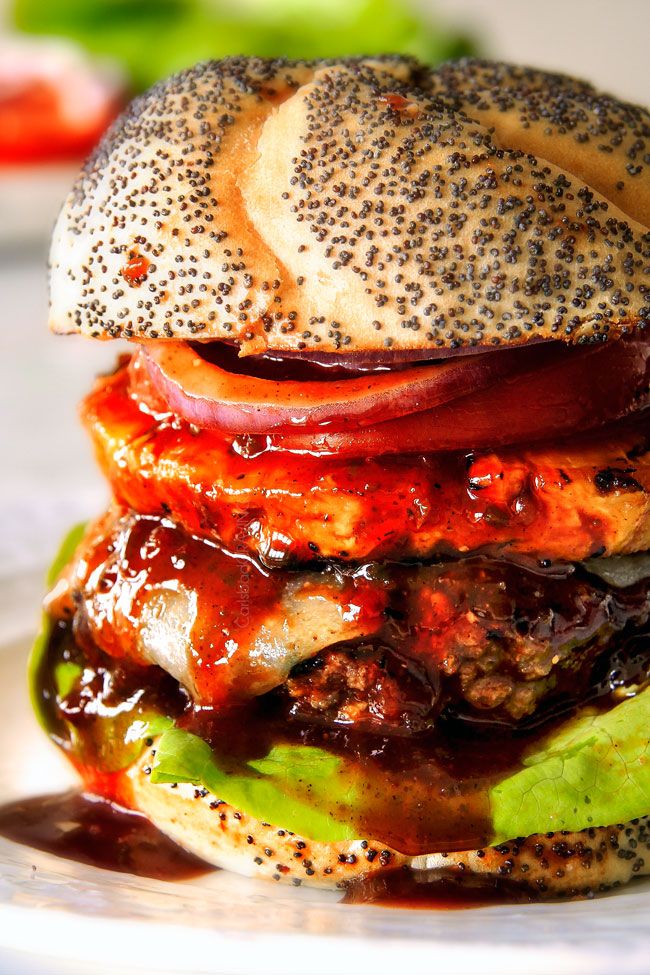
Why These Burgers are the Best
These Salmon Burgers with Sriracha Mayo are over the top crispy on the outside, flaky on the inside and caramelized with this beautiful golden color that SHOULD BE MADE INTO A CRAYON.
But, seriously. How golden and crispy is that?!
When the crispy salmon burger is piled onto the soft pillowy brioche bun, you could stop there. BUT NO. Let’s keep going, shall we?
Let’s also add a huge schmear of sriracha mayo. Yes, mayonnaise mixed with sriracha aka the perfect blend of creamy + spicy that you didn’t know you needed in your life but once you try it you will eat it on everything. It really gives the burgers the ooomph they need to take it to the next level.
Speaking of taking these burgers to the next level, hello easy creamy coleslaw! The coleslaw is tangy, crunchy and is the absolute perfect texture balance to the flaky burgers.
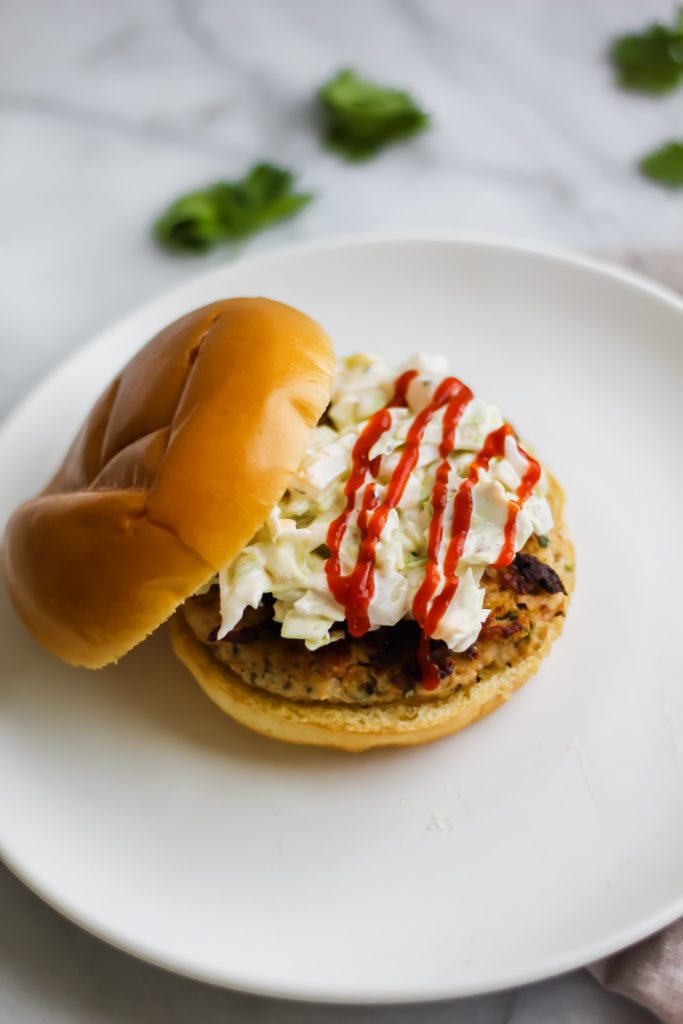
For some extra goodness, make sure and drizzle a little bit more of the sriracha sauce on top, place the top bun on and DEVOUR!
So let’s get into what you need for this recipe…
Preparing chicken tenders
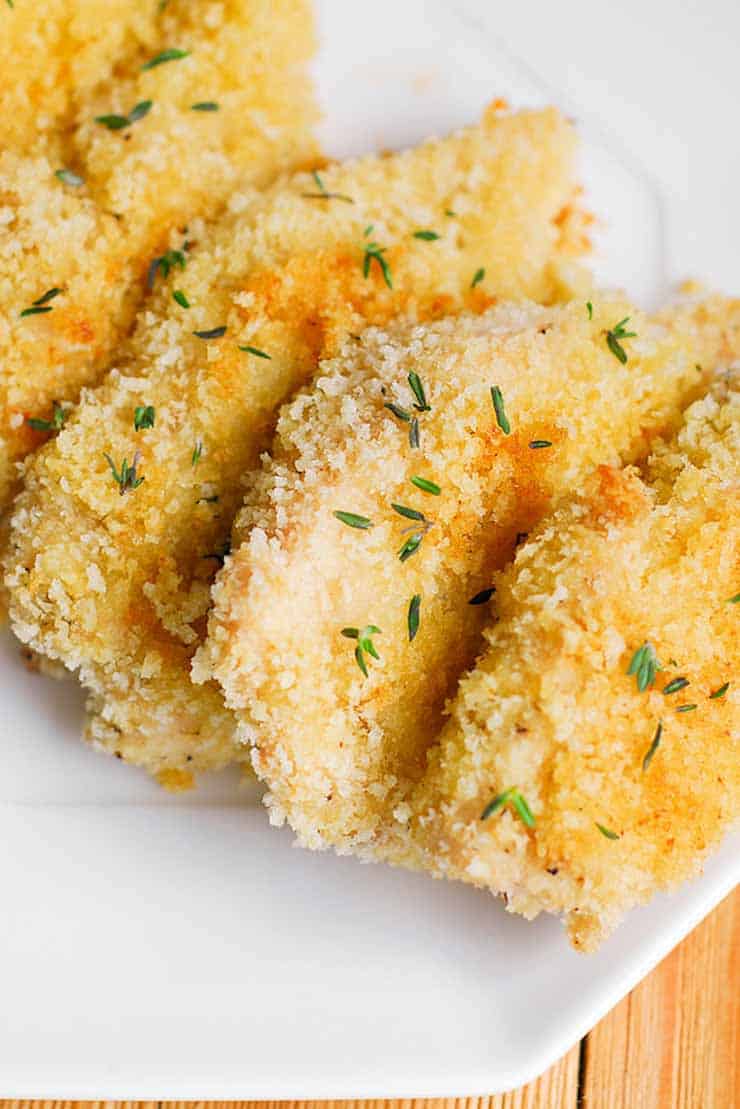
Prep work is really easy! First dip the chicken strips into mayonnaise. Then dredge them in the seasoned bread crumbs mixture. It includes Garlic Powder, Onion Powder, Salt and Pepper. Mayo is the glue that will hold the crumbs together. And I think it’s the mayo that makes them so addictive! By the way, I use regular mayo in the mixture, but like to eat them dipped into Sriracha mayo.
To start making them, place crumbled chicken nuggets in a single layer on the baking sheet. That’s it! They are ready for the oven.
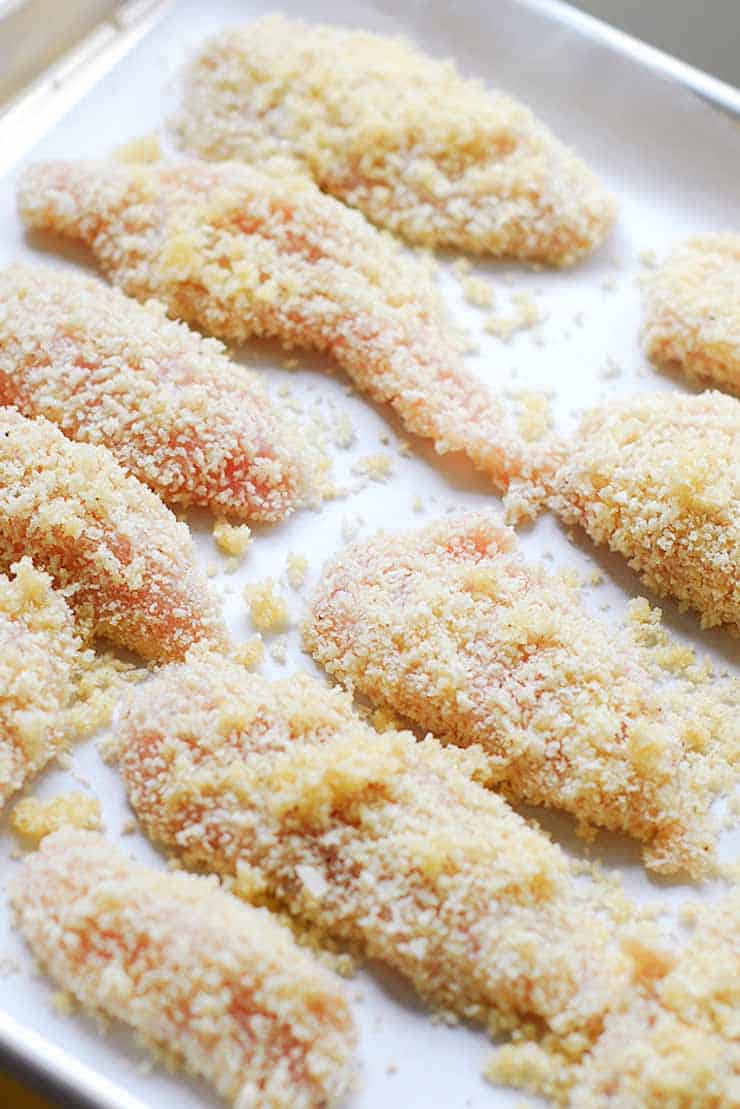
The resulting crumbed chicken tenders with lovely golden crumb are just fabulous. These can be served fresh, or kept refrigerated for up to 5 days.
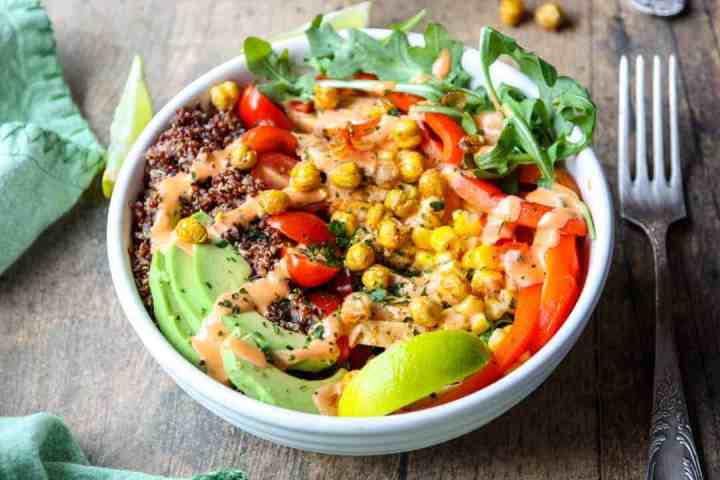
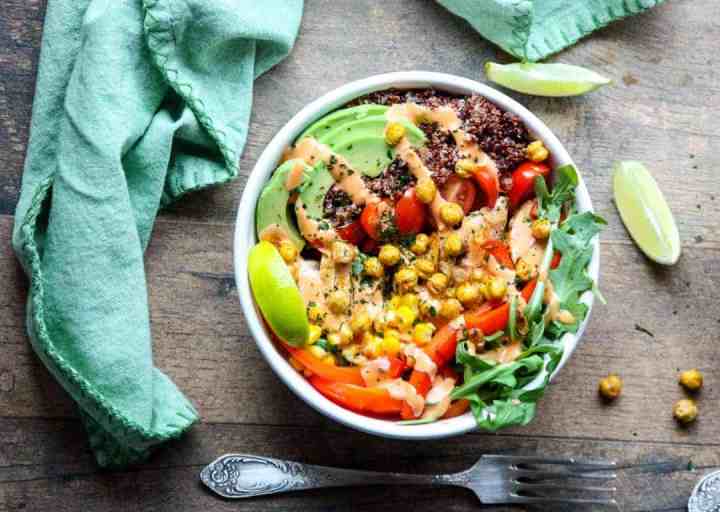
What Makes a Good Burrito Bowl?
Bowls are a fun way to pack a lot of goodness into a meal, and the possibilities really are unlimited. For this recipe, however, I’m going to try to encapsulate the essential elements of an ideal burrito bowl:
- Grain: I’m using quinoa here, but you could also use rice, barley, faro, or any grain. To keep it gluten-free, I often choose cooked rice, buckwheat groats, or quinoa.
- Protein: Any kind of meat, chicken, shrimp, salmon or tofu. Beans are also a great option, such as black beans, kidney beans, and chickpeas.
- Fresh Veggies: Absolutely any veggies that you enjoy raw will work.
- Cooked Veggies: Sweet potatoes, squash, green beans, carrots, or corn.
- Greens: Spinach, Kale, Micro-greens, Arugula, or any leafy green
- Crunch: Nuts & seeds
- Dressing: Tart, sour, sweet, salty, spicy, any combination!

Recipe
Want to save this recipe?
Ingredients
- ▢ 2 chicken breasts boneless, skinless
- ▢ 3 tablespoon olive oil
- ▢ 2 tablespoon chili powder
- ▢ 1 teaspoon garlic powder
- ▢ 1 teaspoon cumin
- ▢ 1 teaspoon salt
- ▢ freshly ground pepper
- ▢ 1 14 oz can chickpeas drained
- ▢ 2 red bell peppers halved & cored
- ▢ 1 cup corn fresh or frozen
- ▢ 1 cup quinoa cooked & cooled
- ▢ ¼ cup salsa chunky
- ▢ 2 cups arugula
- ▢ 1 cup cherry tomatoes halved
- ▢ 1 avocado halved & sliced
- ▢ 3 tablespoon mayonnaise
- ▢ 1 tbs sriracha sauce adjust to taste
- ▢ 1 tbs honey
- ▢ 1 lime sliced into wedges
- ▢ 4 tablespoon cilantro chopped
Instructions
- Preheat oven to 425°
- Line a large rimmed baking sheet with parchment.
- In a large bowl, whisk together olive oil, chili powder, cumin, and garlic powder. and salt.
- Pat chickpeas as dry as possible, then toss them in the seasoned olive oil mixture.
- Spread seasoned chickpeas in a single layer over ⅓ of the baking sheet.
- Next, toss the chicken breasts in the remainder of the olive oil mixture. Put the chicken on the baking sheet beside the chickpeas.
- Add the bell pepper halves, cut side down
- Repeat the above 2 steps with the corn kernels
- Put the bell pepper halves, cut side down, on the baking sheet.
- Sprinkle everything with fresh ground pepper to taste
- Put everything into the oven for 30 minutes, turning half way through
- Remove from oven and allow to cool
- Stir salsa into the cooked quinoa
- slice cooked chicken across the grain.
- Remove skin from peppers, rinsing under cold water and sliding off with your fingers. Slice peppers into strips.
- In a small bowl, whisk together mayonnaise, sriracha, and honey until combined
Assemble the Bowls
- Divide Arugula between four bowls.
- Divide quinoa, chicken, roasted peppers, avocado slices, and cherry tomatoes between each bowl
- Drizzle sriracha sauce over each bowl, and top with lime wedges, cilantro, and crispy chickpeas.
Notes
Chicken should be cooked to an internal temperature of 165°
You will have more crispy chickpeas than you need for this recipe, but they are great for snacking or topping soups and salads. They store well in a covered container in the fridge.
If you are making these bowls for meal prep, squeeze the limes over the avocado to keep them from turning brown, and either pack the sriracha mayo sauce on the side, or leave out the arugula.
Serving: 1serving | Calories: 465kcal | Carbohydrates: 37g | Protein: 18g | Fat: 29g | Saturated Fat: 4g | Cholesterol: 40mg | Sodium: 1073mg | Potassium: 992mg | Fiber: 9g | Sugar: 11g | Vitamin A: 3680IU | Vitamin C: 100mg | Calcium: 69mg | Iron: 3.3mg
Tried this Recipe? Pin it for Later!Mention @TheFoodBlog or tag #thefoodblog!
Instructions, FAQs and Other Tips
Instructions (Optimized for Speed)
- Eight hours before cooking (or the night before) add all the marinade ingredients together and marinade the chicken for 8-12 hours ideally — 4 is sufficient.
- Start preparing the dish by cooking your noodle of choice. Drain and set aside.
- Grate the cheese(s) and divide into 4 equal parts.
- In a medium pan, make a roux by melting butter and cooking off flour. Add in milk/cream and simmer until thickened. Remove from heat and mix in spices and ½ of the cheese. Allow the cheese to melt completely.
- Combine the pasta, cheese sauce and ¼ of the grated cheese. Place in an oven safe dish and top with the remaining ¼ portion of cheese.
- Bake for 15 minutes uncovered until bubbly and browned. If desired, broil for a few minutes for extra browning.
- While the mac and cheese is baking, breading ingredients. Remove chicken from fridge and shake off excess buttermilk. Coat in flour mixture. Repeat process of buttermilk and flour coating 2 times. Set aside.
- Heat oil in a dutch oven or deep fryer to 360 degrees. Cook chicken until browned and a meat thermometer reads 165 degrees for food safety. Set aside on a wire rack.
Assembly
- If you’re using individual cast iron pans (recommended), place a piece of chicken on top of the mac and cheese and top the chicken with 1 teaspoon of maple butter, or to taste. Optionally, garnish the dish with fresh parsley. Serve immediately.
- If using a large baking dish, divide the mac into cheese into desired portions (about 4) and place chicken on top of the mac and cheese. Place 1 teaspoon of maple butter on the chicken. Optionally, garnish with fresh parsley. Serve immediately.
FAQ:
Can I make this ahead? How do I reheat it? Yes! Mac and Cheese is best served immediately but remains safe for about 5 days in the fridge. To reheat, place the pasta in an oven safe baking dish and bake at 300 until warmed through. For best results, heat the chicken on a separate baking dish and flip once after about 7 minutes.
Can I make this ahead and freeze it? I doubt there will be enough left over to freeze no matter how much you make, but yes. If your plan is to cook this, slightly undercook your pasta for best results. The night before you want to eat it, let it defrost slowly in the fridge. Once defrosted, heat in the oven at 300 until heated through. If you’re lazy, you can nuke it in the microwave for about 5 minutes at medium power. I like to add a bit of milk to the top to help it stay moist.
How to fix dry Mac and Cheese? If your Mac and Cheese comes out dry, you likely cooked down the sauce too much and/or over thickened it. If it’s dry when you’re reheating it, the best bet is to pour a tablespoon or so of milk or cream over the pasta before reheating and then mix it together after it’s heated.
What equipment do I need for this recipe? I always mention a food processor in any recipes involving cheese. I’m really lazy when it comes to grating cheese so I always use my shred setting on my food processor to grate cheese. A cheese grater is definitely sufficient. If it’s an emergency you can use pre-shredded cheese but it won’t melt as well and may make your Mac and Cheese grainy.

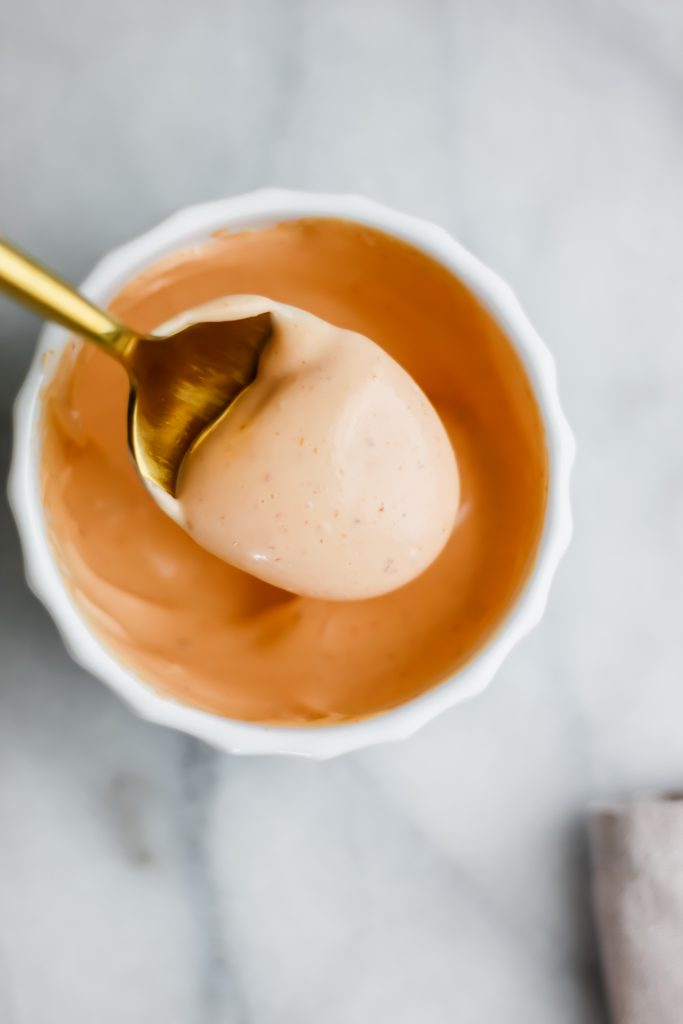
How to make vegan sriracha mayo
Start by soaking the cashews. My go-to method for soaking cashews is to bring water to a boil in the electric kettle then pour it over the cashews. Let the cashews sit for 5-10 minutes then drain the cashews. Discard the water.
Once cashews have soaked and the water has been discarded, add the cashews, fresh water, sriracha, lime juice, salt and garlic powder to the blender.
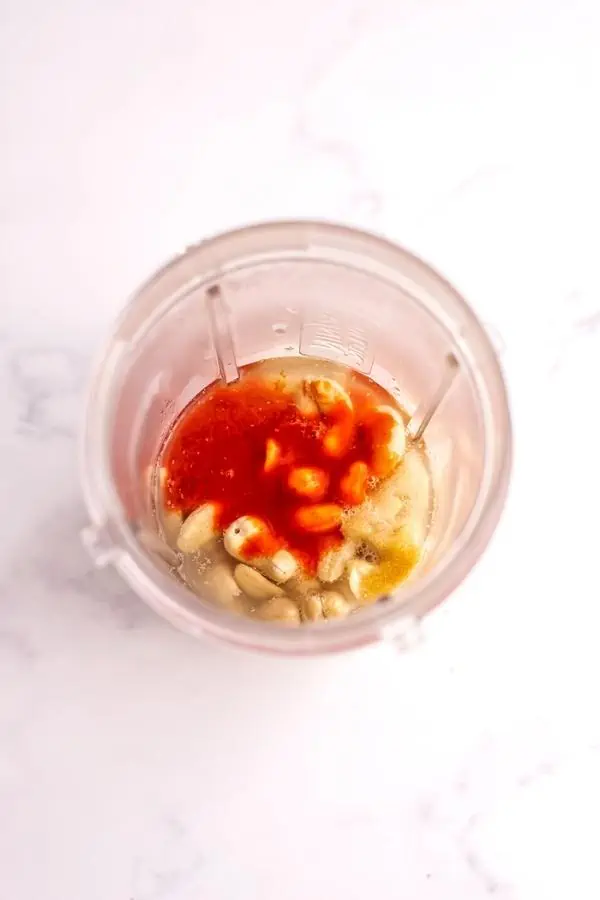
Blend on high for at least 1 minute. I use a bullet style blender for this. You may need to double the recipe for a Vitamix or larger blender to ensure that there is enough volume to mix properly.
Store the leftover vegan sriracha mayonnaise in a well-sealed jar for up to a week. Stir before using.

Top tips
- Be sure to soak the cashews so they blend easily (check out the tips on how to soak cashews below). Even if you are using a high speed blender, I always recommend soaking the cashews to get the creamiest mayo in the least time.
- If you want to make this with store bought mayo, simply omit the cashews and the water, and combine the ingredients in a jar.
- This creamy spicy mayo will thicken as it sits in the fridge, because it is made with cashews. If it gets too thick, you can thin it out by adding water 1-2 teaspoons at a time.
- If you are using a large blender like Vitamix, you may need to double the recipe to ensure that there is enough volume to mix properly (as I use a high speed bullet style blender to make my sauces).
Substitutions and Diet Modifications
Diet Modifications
I’m on a diet, how can I eat this recipe? This probably isn’t the recipe for you. A meal like this isn’t fit for every day consumption. It’s rich, it’s filling and it’s high calorie. If you have a hankering for comfort food, you can try my 5 Minute Microwave Mac and Cheese that only clocks in at 300 calories a serving. You can also «fry» the chicken with an Air Fryer or in a convection oven.
Can this recipe be made vegetarian? Yes! Leave out the chicken and just make the Mac and Cheese. That will change the recipe significantly and I’d recommend not putting maple butter on without the chicken. Alternatively, you can serve it with meatless chicken tenders like these ones from Gardein.
What about vegan? Honestly, there are some amazing vegan Mac and Cheese recipes that I’d recommend instead of trying to veganize this one. Although very different, you can use my vegan baked mac and cheese recipe and top with meatless chicken tenders and maple butter,
Can this recipe be customized for a keto diet? Sort of! For keto, I’d recommend substituting macaroni with steamed cauliflower. Instead of using a mix of milk and cream for the sauce, just use cream and use about half the amount. Feel free to add in cream cheese for extra fat and to thicken. As for the chicken — use this recipe from Savory Tooth instead.
Substitutions
…Chicken Breasts? Chicken thighs can be substituted. You’ll need to cook the chicken for slightly less time or they’ll dry out. Make sure either the breast or the thigh are boneless and skinless.
…Maple Butter? Maple syrup is a great substitution! If you don’t have either, it can be left out entirely or replaced with honey in a pinch. Don’t use artificial syrups like Aunt Jemima as they’re basically corn syrup and just add sweetness with no depth of flavor.


Another amazing option is Hot Honey! If maple isn’t your thing, try this incredible hot honey recipe from Casual Foodist. If you love spice, it pairs perfectly with the sriracha fried chicken.
…Sriracha? Add in some cayenne pepper, about 1 teaspoon. If you don’t like spice this can be left out all together.
…Cream/Milk? If you only have milk/cream or don’t have the right percentage of milk — it’s just important that you use the same amount of liquid. Use the dairy you have and just know that different fat percentages being subbed out will either make the dish thinner, less rich or thicker.
…Buttermilk? Pour 1 tablespoon of white vinegar into a 1 cup measuring cup. Fill the rest of the cup (up to the 1 cup line) with milk. It’s not the exact same as buttermilk but works better for a recipe like this than it would in baking.
…Cheddar/Smoked Gouda? No worries — use what you have. Just make sure you use the same amount of cheese and avoid non-melting cheeses like Halloumi/Paneer, very mild cheeses like Mild Cheddar/Mozzarella or overly pungent cheeses like Gorgonzola. Also, if you use Parmesan, make sure it makes up no more than ¼ of the cheese and that you reduce the salt.
…Macaroni? You can use any noodle at all. I prefer short ones over shapes like spaghetti, fettuccini or linguine.

Why a Bowl?
«Burrito» bowls contain all the mouthwatering ingredients you would find in your favorite burrito — but without the tortilla wrap. Bowls are a great choice for anyone avoiding gluten or excess carbs, they make for great leftovers, and you can always just get a bigger bowl if you want more toppings!
Bowls are also much less messy to eat. Plus, they may even make your food taste better and give you a better eating experience, at least according to the article Reasons Why Food Tastes Better in a Bowl.
Burrito bowls are also a great option for all of my meal-prepping friends out there! Although meal prep is not my focus, I do know that these sriracha chicken burrito bowls are perfect for meal prepping. There are many blogs and websites out there that are all about meal prep, a concept which I think is convenient, efficient and time-saving.
Putting the ‘crispy’ in crispy chicken salad
There are a few different ways to make sure that your chicken is super crispy on the outside and tender on the inside. Here are some tips for success:
- Don’t fry chicken cold from the fridge: If you’re marinating the chicken for a quick 30 minutes, this won’t be a problem, but if you’re letting it hang out in the refrigerator overnight, make sure you’re not frying the chicken straight from the refrigerator. You’ll want it to hang out at room temperature for at least 30 minutes before dredging it and frying
- Use a cast iron skillet: my cast iron skilletis one of my favorite kitchen workhorses. A thick skillet will retain the heat and fry the chicken more evenly, so you don’t need a deep fryer for this recipe. In fact, I almost encourage you not to ever get one!
- Use a meat thermometer: When you’re frying the chicken tenders, make sure they reach an internal temperature of 165 degrees. Investing in a digital meat thermometer will take the guesswork out of it! Just insert the thermometer into the thickest part of the chicken (making sure only to go ½ way through) and let the thermometer read it for you. The chicken tenders will take anywhere from 5-9 minutes to cook all the way through depending on the thickness.
- Don’t use an oil that has a low smoke point: olive oil is not your friend when you’re frying chicken tenders. Instead, use peanut oil, canola, corn or vegetable oil for best results.

📖 Recipe

Equipment
- ▢ Baking Dish (preferrably cast iron — though ceramic or glass is fine)
- ▢ Dutch Oven, Deep Pan or Cast Iron (for deep frying)
Ingredients
Sriracha Fried Chicken
- ▢ 1 cup buttermilk
- ▢ 2 tablespoon sriracha
- ▢ 2 chicken breasts
- ▢ 1 cup flour
- ▢ 2 teaspoon thyme
- ▢ 2 teaspoon mustard powder
- ▢ 1 teaspoon onion powder
- ▢ 1 teaspoon garlic powder
- ▢ 1 teaspoon paprika
- ▢ 1 teaspoon cayenne powder
- ▢ 1 teaspoon salt
- ▢ 1 teaspoon black pepper
- ▢ peanut oil for frying
Two Cheese Mac and Cheese
- ▢ ½ lb elbow macaroni
- ▢ ¼ cup butter unsalted
- ▢ ¼ cup all purpose flour
- ▢ ¾ cup whole milk
- ▢ 1 ¼ cup cream 18%
- ▢ 2 cup cheddar cheese grated
- ▢ 1 cup smoked gouda grated
- ▢ ½ teaspoon mustard powder
- ▢ ⅛ teaspoon paprika
- ▢ 1 teaspoon salt
- ▢ ¼ teaspoon black pepper
Assembly
- ▢ 4 teaspoon maple butter
- ▢ parsley optional
Instructions
- Combine sriracha and buttermilk. Cut chicken breasts in half lengthwise and add to buttermilk marinade. Let sit in the fridge for an hour to marinade. If desired, it can marinade overnight though only 1 hour is needed.
- Once the chicken is fully marinated, preheat oven to 365 degrees. Lightly grease your baking dish of choice — preferably cast iron but any oven safe baking dishes work fine.
- Bring a large pot of heavily salted water to a boil. Cook to package instructions for al dente, minus 1 minute. Drain and set aside in a bowl — mix noodles with a bit of cooking oil to prevent from sticking.
- Grate the cheese if it isn’t already and mix cheeses together. Divide into 3 groups, ½ of it for the sauce and two ¼ groups for the casserole and topping respectively.
- Heat a medium saucepan over medium heat. Melt in butter until slightly bubbled but not brown, add in flour and whisk to combine. Cook for about a minute to cook out the flour. Slowly incorporate the milk & half and half while whisking constantly. Allow to thicken enough that it coats the back of a spoon — thicker than cream but less thick than condensed soup. Make sure to whisk constantly to avoid the sauce burning or sticking to the bottom of the pan.
- Remove from heat and mix in the remaining spices and the ½ section of cheese. Allow the cheese to melt completely. In a large mixing bowl, combine the cooked pasta, cheese sauce and one of the ¼ portionss of the grated cheese. Place in your oven safe dish and top with the remaining ¼ portion of cheese.
- Bake for 15 minutes uncovered until bubbly around the edges. If the top isn’t browned to your liking, place the oven on broil. Watch closely to avoid burning the cheese. When cooked to desired crispiness, remove from oven and set aside.
- While the mac and cheese is baking, mix together flour, thyme, mustard powder, onion powder, garlic powder, paprika, cayenne, salt and pepper to create a flour dredge coating.
- Remove chicken from fridge and shake off excess buttermilk. Coat in flour mixture. Repeat process of buttermilk and flour coating 2 times. Set aside.
- Heat oil in a large pot, dutch oven or deep fryer to 360 degrees. The cooking temperature should be 350 degrees, but adding the chicken will lower the temperature.
- Cook chicken until browned and cooked internally, about 3 minutes per side (juices should run clear) or a meat thermometer reads 165 degrees for food safety. Set aside on a wire rack to wait for assembly.
Assembly
- If you’re using individual cast iron pans (recommended), place a piece of chicken on top of the mac and cheese and top the chicken with 1 teaspoon of maple butter, or to taste. Optionally, garnish the dish with fresh parsley. Serve immediately.
- If using a large baking dish, divide the mac into cheese into desired portions (about 4) and place chicken on top of the mac and cheese. Place 1 teaspoon of maple butter on the chicken. Optionally, garnish with fresh parsley.
Calories: 1350kcal | Carbohydrates: 89g | Protein: 70g | Fat: 82g | Saturated Fat: 45g | Cholesterol: 312mg | Sodium: 2552mg | Potassium: 958mg | Fiber: 4g | Sugar: 13g | Vitamin A: 3240IU | Vitamin C: 9mg | Calcium: 1031mg | Iron: 4mg
Tried this Recipe? Pin it for Later!Mention @MaritimeGlutton or tag #maritimeglutton!
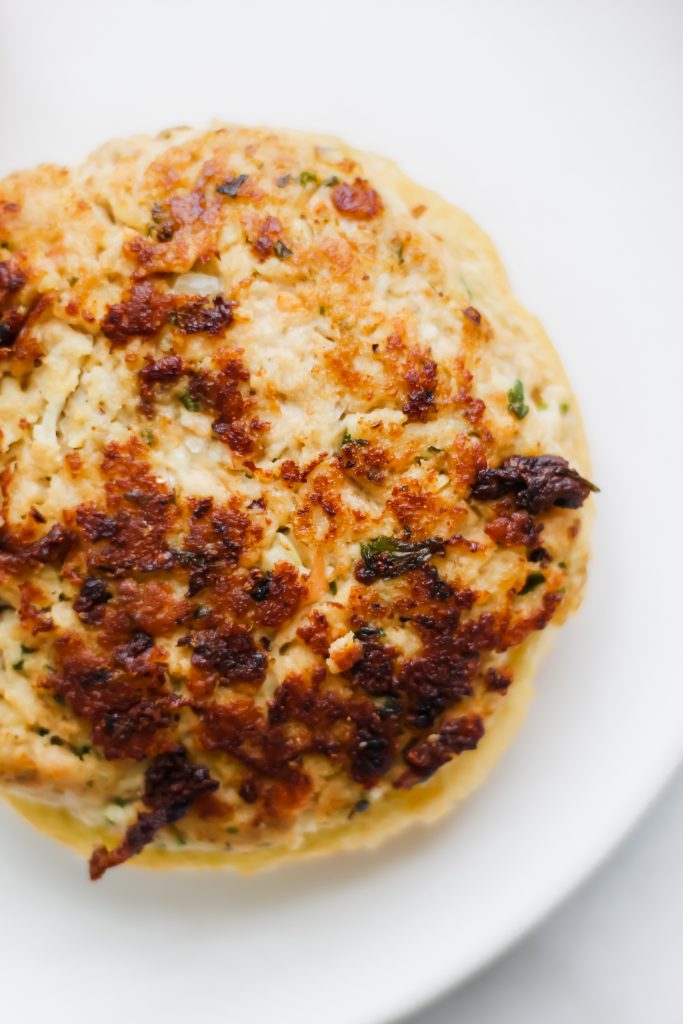
The secret ingredient for crispy baked chicken tenders
The “special ingredient” in these baked breaded tenders is the Panko. Instead of breadcrumbs or just flour I use panko. Panko is generally used in Japanese cooking and it can be found in the grocery store in the Asian foods aisle. I definitely prefer panko to regular breadcrumbs because of its lighter and more delicate texture. It results in a more crispy and crunchy end product than breadcrumbs. Especially when you are baking chicken instead of frying; the panko makes a huge difference!
When I made them, I wasn’t sure if they should be called oven baked chicken nuggets or baked chicken tenders. My son loves calling them golden nuggets, however the adults in my family prefer to call these crumbed chicken. And I feel so much better feeding him this healthier oven baked version vs. fast food deep fried chicken.
More Air Fryer Chicken Recipes You’ll Love:
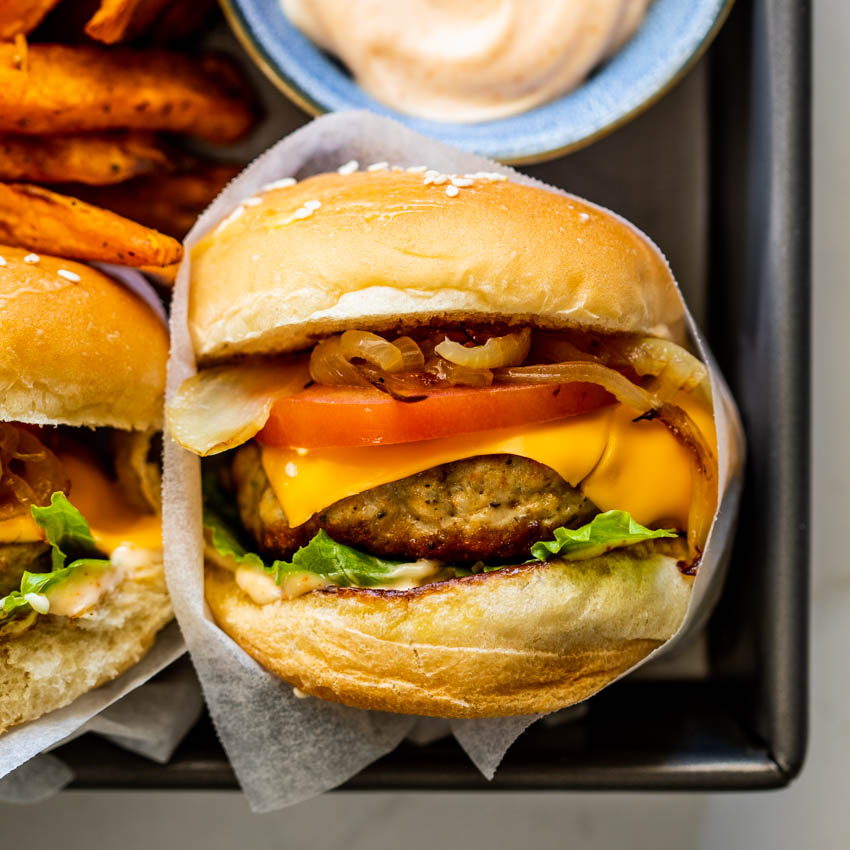
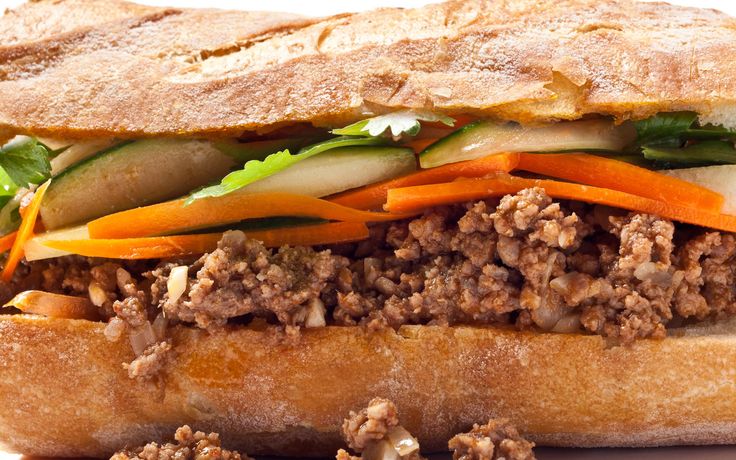
Air Fryer Chicken Sandwich with Sriracha Mayo
334 Cals35 Protein31 Carbs8 Fats
This spicy, Air Fryer Chicken Sandwich inspired by Chick-fil-a is made with lean chicken breast brined in pickle juice and buttermilk, served with pickles and sriracha mayo – SO good!
- 2 16 ounces boneless, skinless chicken breasts
- 1 cup 1% buttermilk
- 1 cup pickle juice
- 1 large egg, beaten
- Kosher salt
- 1/2 cup all purpose flour
- 1/2 teaspoon garlic powder
- 1/2 teaspoon paprika
- 1/8 teaspoon cayenne pepper
- olive oil spray
- 4 tablespoons light mayo
- 1 tablespoon sriracha
- 12 dill pickle chips
- 4 whole wheat potato rolls, such as Martins
-
Pound out the thicker end of the chicken breast to make the thickness even on both ends, about 1/2-inch thick, this will ensure the chicken cooks even, then cut each breast in half to make 4 pieces.
-
Whisk buttermilk and pickle juice in a bowl.
-
Add chicken and toss to coat; cover with plastic wrap and chill at least 6 hours or overnight.
-
Combine flour, garlic powder, paprika, 1/2 teaspoon salt, and cayenne pepper in a shallow bowl.
-
Whisk egg in another bowl.
-
Line the air fryer basket with an air fryer parchment liner (these are sold on Amazon, look for parchment with the holes).
-
Working with one chicken breast at a time, dip chicken in flour mixture, shaking off excess. Then into the egg and back into the flour, using the back of a fork to coat well so it adheres.
-
-
Shake excess then transfer to the prepared air fryer basket and spray tops with oil.
-
Air fry in batches as needed 380F until golden and cooked through, about 15 to 18 minutes, turning halfway depending on the thickness, or until an instant-read thermometer inserted into the thickest part of the breast reads 165°F.
-
Meanwhile combine sriracha and mayo in a small bowl.
-
To assemble sandwiches, place the mayo on the top of rolls, place the chicken on the bottom roll followed by the pickle chips and tops of rolls.

Serving: 1sandwich, Calories: 334kcal, Carbohydrates: 31g, Protein: 35g, Fat: 8g, Saturated Fat: 1.5g, Cholesterol: 100mg, Sodium: 796mg, Fiber: 6g, Sugar: 7g
Blue Smart Points: 6
Green Smart Points: 8
Purple Smart Points: 6
Keywords: air fryer chicken breast, air fryer chicken sandwich, fried chicken sandwich